Chapter 2 - Python environments
Contents
Chapter 2 - Python environments#
2023 April 6
What is a programming language?#
For all intents and purposes, a programming language is a means to give instructions to a computer. Read Python’s executive summary here.. You can write your Python code in different environments:
Google Colab Notebook
Local Anaconda Jupyter Notebook environment
Jupyter Lab notebook via Binder
Text editor and running scripts
Note that options 3 and 4 might not work for you right now, but know that they exist!
It is hard to say which is “better” or “best”, since this is dependent on the task at hand. In TAML sessions we will use Google Colab, which functions similar to a local Anaconda Jupyter Notebook.
Run the code#
Recall that shift and enter will run a code cell or render a markdown/text cell. It will also advance the cursor to the next cell.
control and enter will run a cell, but will keep the cursor in the current cell.
1. Google Colaboratory#
REQUIRED: Set up your Colab environment before the bootcamp!#
Google Colab is the easiest way to run the TAML materials. Start by installing the extension to your Stanford Google Drive account.
Enter your SUNet email address on the “Choose an account” screen
Click “My Drive”
Click the “+New” button and select “Google Colaboratory”
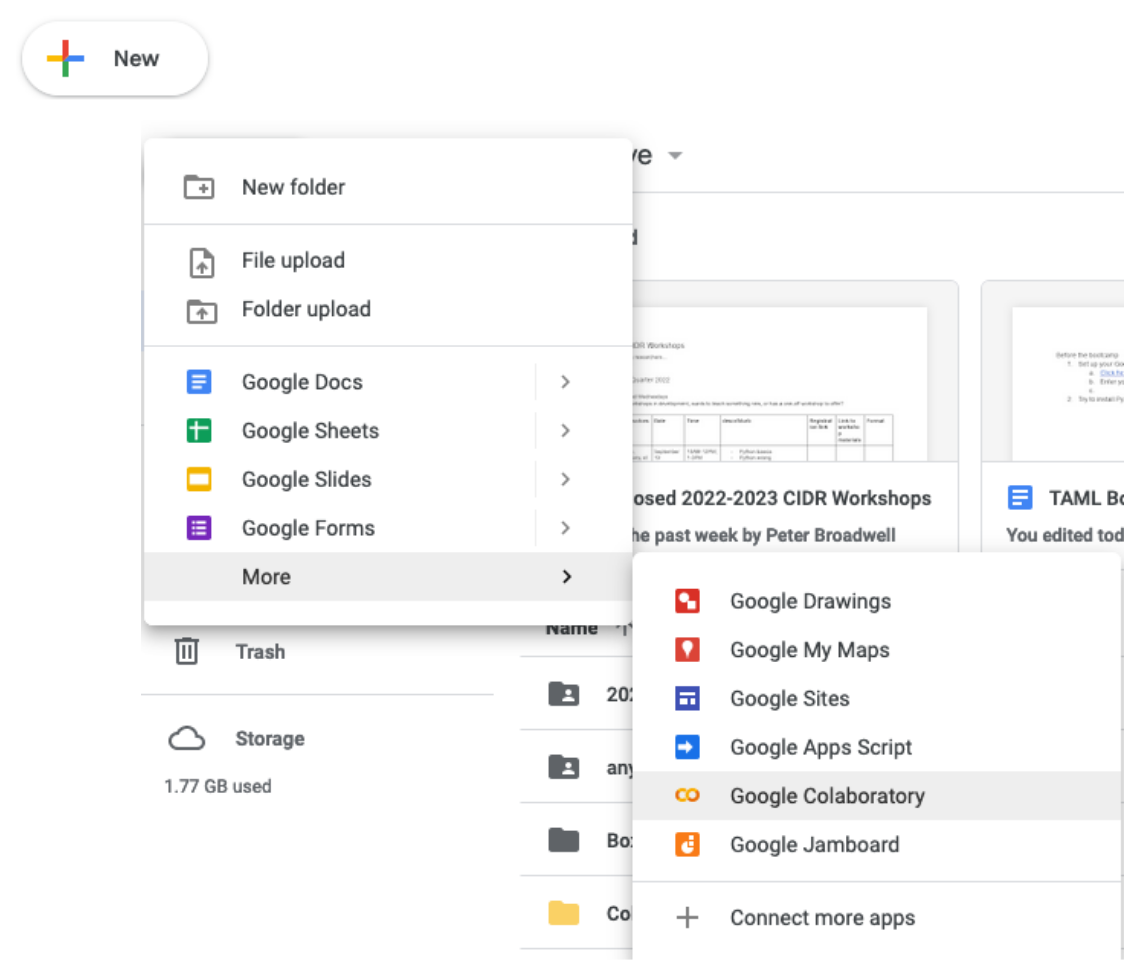
If you do not see this option, click “+ Connect more apps” and search for Colaboratory and the icon will appear.
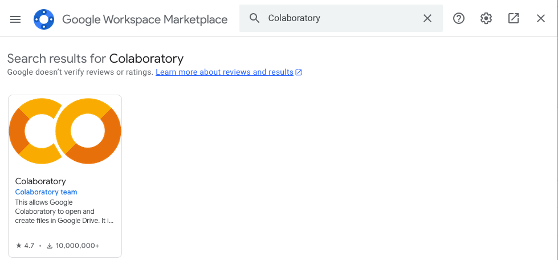
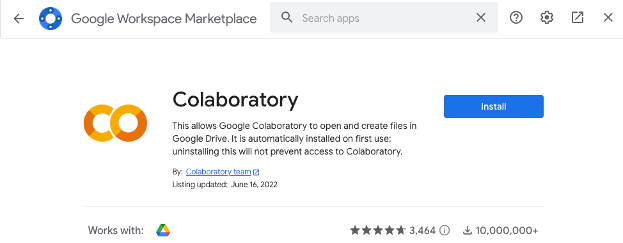
Click the brown and orange Colaboratory icon and click “Install”
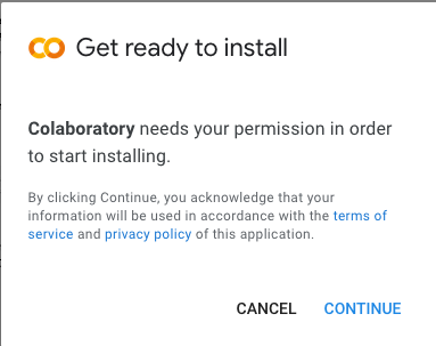
Click “Continue” and select your stanford.edu account if prompted
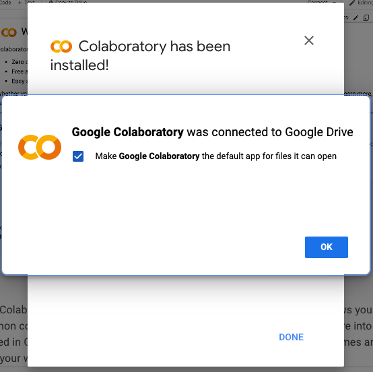
You will see that Colaboratory was successfully installed/connected to Good Drive when finished. Click OK and Done to complete and close any remaining pop-up windows.
Code versus markdown cells#
Click the Colab badge at the top of each chapter in the book.
Click the Run button in the toolbar, or press shift and enter on your keyboard to execute the cell.
Save your work#
Click the Copy to Drive toolbar button, or
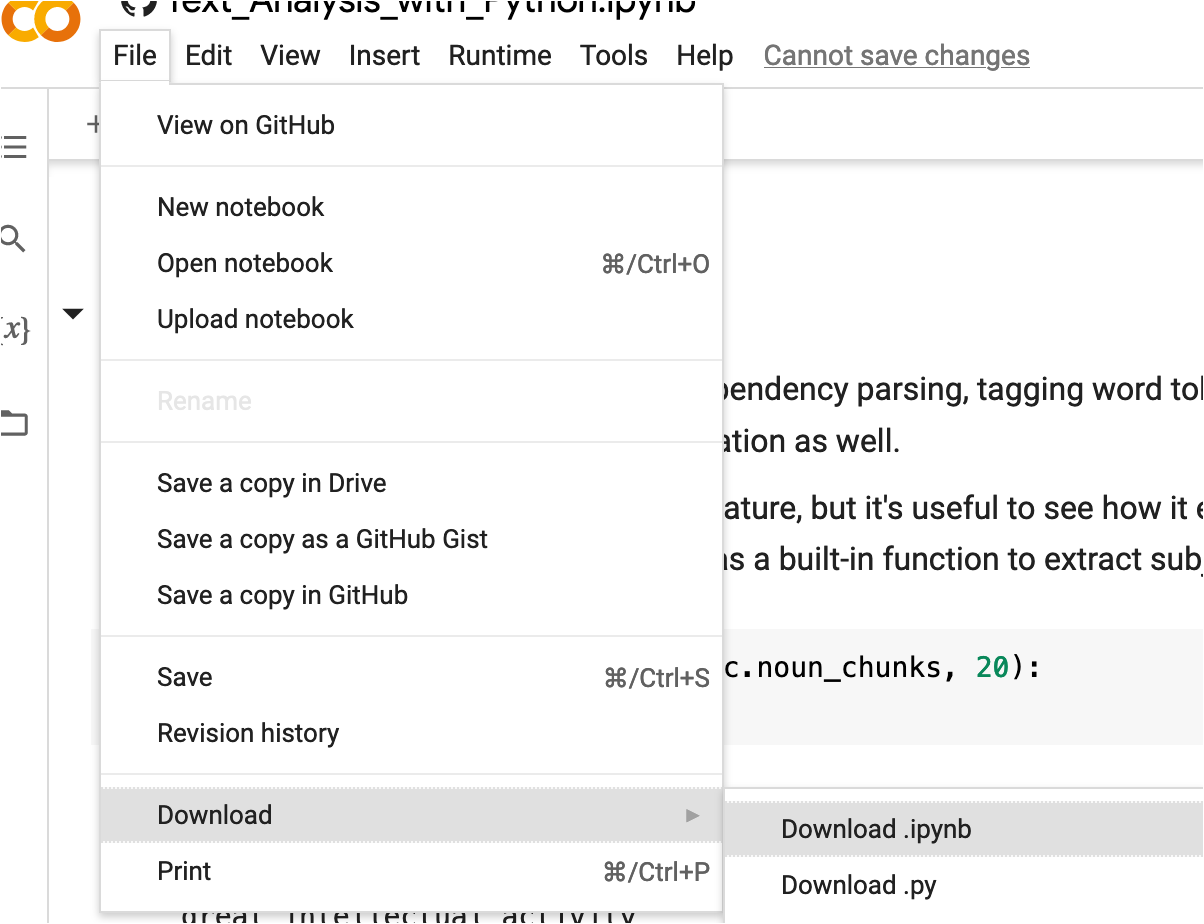
Click “File” –> “Download” –> “Download.ipynb”
Learn more#
Check out Google Colab Tips for Power Users for shortcuts.
3. Local Python installation#
Despite the increasing number of cloud-based solutions, it is always good to have a local installation on your own computer. Point your web browswer here to install Python Anaconda distribution 3.9 (as of August 2022): https://www.anaconda.com/products/individual
Download the installation file for your operating system, open it, and follow the instructions to install.
Once installation completes, open the application named “Anaconda Navigator”. It looks like this:
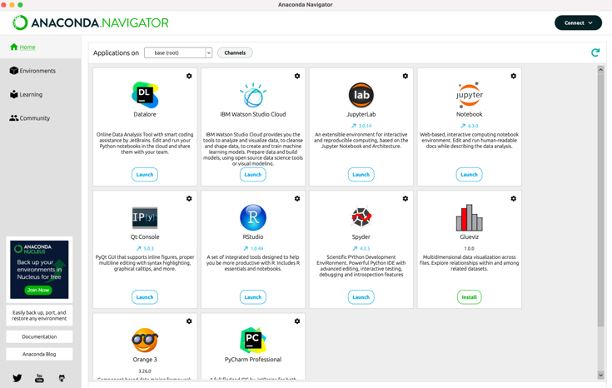
Click the “Launch” button under either Jupyter Notebook or Jupyter Lab.
Open the
.ipynbnotebook you just downloaded from JupyterLab in your local installation and repeat the steps above.
Download the workshop materials#
You can also download the TAML materials for use on your local installation.
Click the green “Code” button
Click “Download ZIP”

Extract this folder someplace familiar (we recommend your Desktop).
Open Anaconda Navigator, launch JupyterLab, navigate your your file structure, and click the notebook file to launch it.
git clone#
Git users open a Terminal and type: git clone https://github.com/EastBayEv/SSDS-TAML.git
Install external libraries#
Install user-defined software libraries to enhance Python’s functionality. In a new notebook cell type !pip install <library name>, e.g.:
!pip install pandas!pip install seaborn
Dead kernel?#
The notebook kernel will fail from time to time, which is normal. Simply click “Kernel” from the File menu and one of the “Restart” options.

NOTE: about the terminal, you will see it run processes in the background like this - you can ignore this, but don’t close it!

If you accidentally delete a Jupyter Notebook …#
Check your operating system’s Recycle Bin!
3. Jupyter Lab#
JupyterLab is another way to access these materials. It is a web-based interactive development environment (IDE) which allows you to write and run code in your browser.
Cick the “Launch Binder” button below and open it in a new browser tab.
Click “Python 3 (ipykernel)”#
Click “Python 3 (ipykernel) under the “Notebook” header to open a blank notebook.
Otherwise, navigate the file structure in the top left corner to open an existing notebook.

Cells are code by default#
Open a blank notebook and in the first cell, type:
print(“Your Name Here”)
Insert new cells#
Click the “plus” button to insert a new cell. It can be found between the “save disk” and “scissors” icons.

Alternatively, click on an area outside of any cells in the notebook, and press the a or b key to create a new cell above or below your current one.
Switch between code and text cells#
Switch between code and text cells by clicking the dropdown menu.

Edit a markdown cell#
Double-click a markdown cell to edit it. Press shift + enter to render the text.
Go through the cells on this page and check out Markdown Cheatsheet (direct links to different sections below) to explore formatting rules and shortcuts.
Table of Contents
Headers
Emphasis
Lists
Links
Images
Code and Syntax Highlighting
Footnotes
Tables
Blockquotes
Inline HTML
Horizontal Rule
Line Breaks
YouTube Videos
Save your work#
Click the “disk” icon to save your work. Right-click the tab and click “Rename Notebook” to give your notebook a name:

Click “File” –> “Download” to save your Jupyter Notebook (extension
.ipynb) before exiting a Jupyter Lab session.There are many other options, take some time to explore the top menu and buttons.

Close and halt#
Safely close the notebook by clicking “File” –> “Close and Halt” before closing your browser.

4. Text editors#
You might find that Jupyter environments are too limiting for your task. Using a text editor to write your scripts and run them via the command line is another common option. Other options exist, such as Sublime, Atom, Spyder, and more!
Exercises#
Ensure you have set up the Google Colaboratory (Colab) environment following the instructions in #1 listed above.
Download and check that you can correctly open these notebooks in a Jupyter Notebook on your local machine.
Basic Python syntax#
Now that you understand a little about the environments in which we can program Python, open Chapter 3 “Basic Python syntax” to start coding!


